How did you use new media technologies in the construction and research planning and evaluation stages?
Final Cut Pro
We used Final Cut pro to create, edit and publish our horror teaser trailer. Using this professional software allowed us too edit our recorded shots, create a timeline and add effects to each short cut clip. It was a lot easier to do these activities on this type of software than it would have been on for example, Windows Movie Maker. It allowed us to add a soundtrack and add some dialogue. We were also able to upload our production company onto our trailer as easy as possible by using this software. We found using Final Cut extremely easy as our group was already experienced in using it from last year. To create our teaser trailer we uploaded the shots from our camera and importing them into Final Cut. We would then select what shots we wanted to use, cut it down to the relevant size. Once we cut down our relevant clips, we then dragged our shots onto our project timeline on Final Cut and this allowed us to edit each individual shot and add effects, transitions and overlays. The commonly used effect we used was cross fading. Where one clips fades into the next clip. By doing this you select the end of the shot and click CMD + T. Once you've rendered the project it will save the edit done on your project. We have used soundtracks from Dark Knight and an eerie theme to add into our timeline. We then cut it down to link in with the clips we have edited. We used a action soundtrack timed perfectly with when the action starts on our trailer. Also the sound affect of the heartbeat near the end turning into a flatline heartbeat referring to the victim having died. This helped create a scary and fearful atmosphere.
Screen-Casting
We have used screen-casting to help you understand and see our edited teaser trailer in final cut pro. You can our timeline is full up with our clips. Also the soundtrack and sfx are added under the clips, you can change the level of the loudness as shown on the video dragging up and down the frequency level line. You can also add effects to the videos as shown bottom right of the video. Select the clip you want to change or add effects on and you can hover the mouse over to see what it looks like before committing to that effect. Also you can add titles to your video timeline. You can put it on as an overlay (title over the top of the clip) or do what we did was that we used a smokey effect in the background with LCD font which we downloaded from Dafont.com
PicMonkey

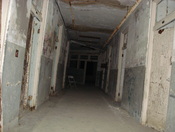
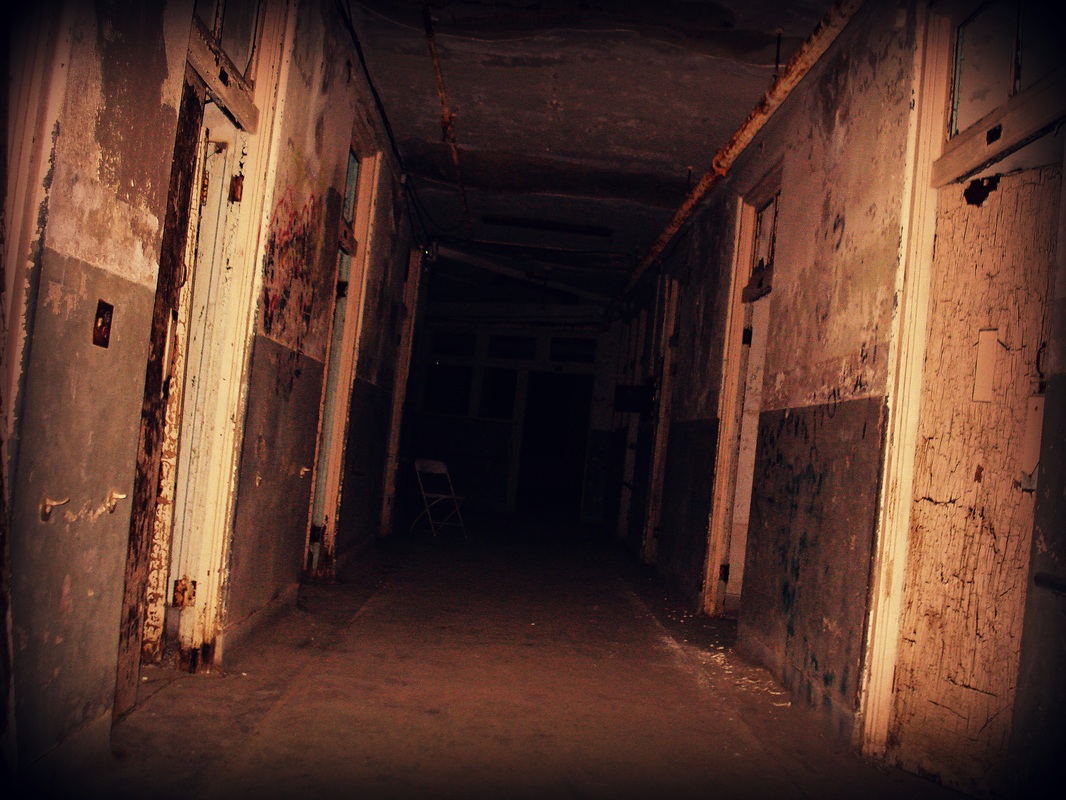
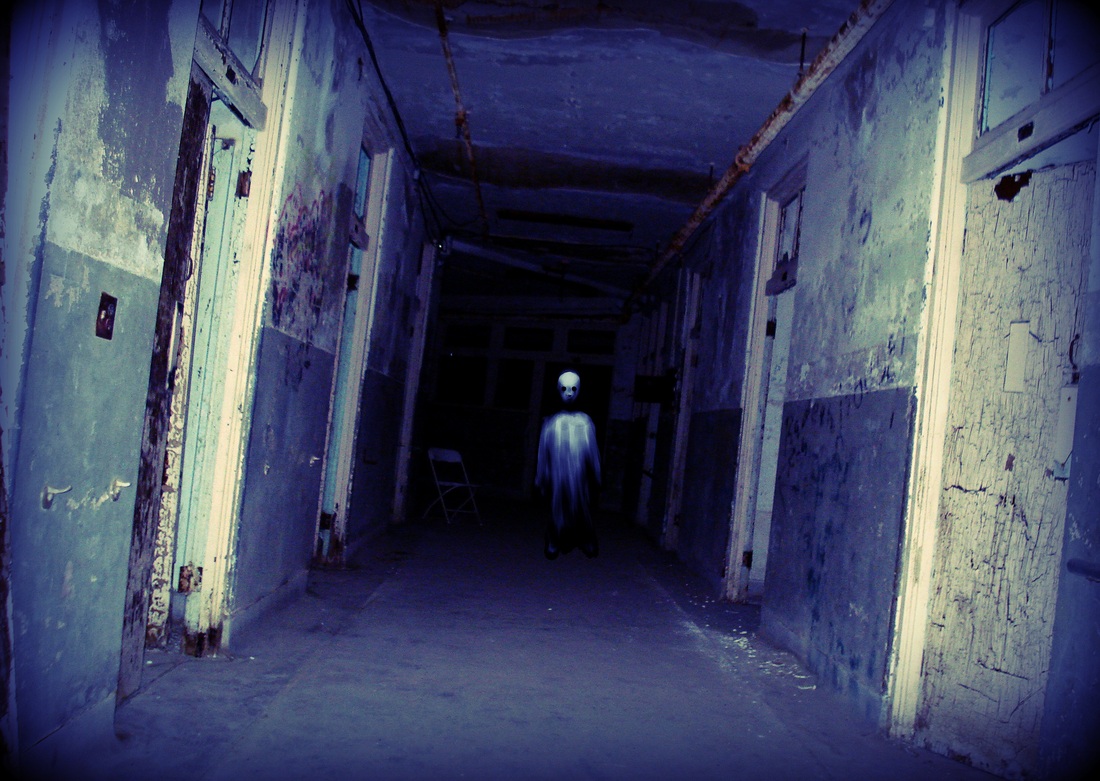
To edit our photos, for our poster and magazine front cover, we used 'PicMonkey'. PicMonkey is an online website that allows a variety of photo effects to make your photos look effective. It can be easier and quicker to add an effect than it would have if you used Photoshop.
|
|
|
As you can see from the pictures above, on the left, is the original image, using PicMonkey, we were able to edit the effects to create a more scarier/horror atmosphere within the picture. This was the same senario with the third picture, using the effects on the PicMonkey we were able to create the second picture, and from the second picture to the third. The Ghostly character in the third picture was added in using photoshop, as PicMonkey didn't allow us to that.
Photoshop
Another software we used that helped us a lot to make our Poster and magazine was photoshop. Photoshop allowed us to use effects that PicMonkey didn't have. It made it easier to put effects and add fonts to our poster and magazine. We used Dafont.com to download fonts that we wanted to use in our work. It allows use to create layers where we can move rounds writing or pictures. Using some of the tools in photoshop, we were able to get the four of use standing infront of the magazine title 'IFILM'.
|
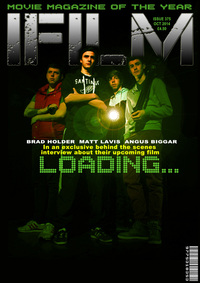
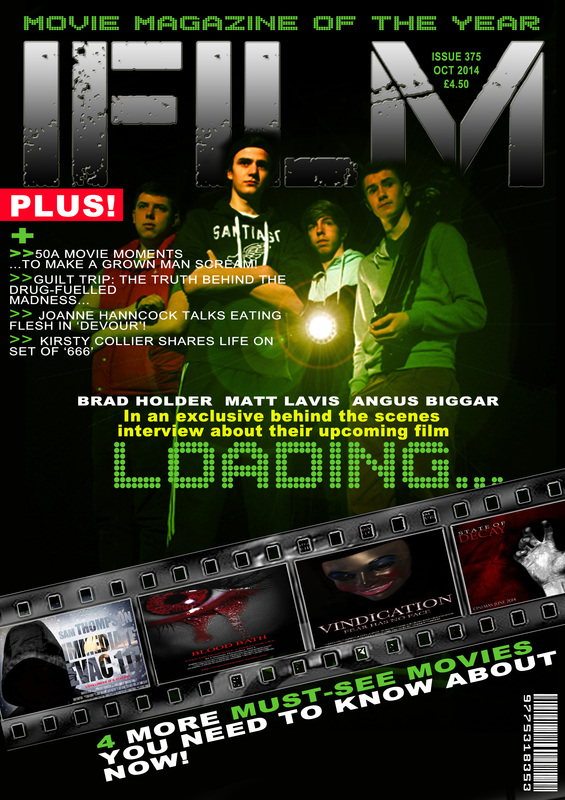
We started of our magazine with the picture of the 'Four' adding the font of our Film title and the title of the magazine! We put the IFILM layer behind us and used the eraser tool so that it looked as if we were standing infront of it.

|
We then added more writing to our magazine. Using the same font we put a caption for our magazine "Movie Magazine of The Year" and added a little information about what the magazine will be including about our film. Also added a barcode, price and issue number.
|
We decided that we needed more pictures and information to make our magazine look authentic. So we added a film strip/reel and added the movie posters of other groups in our media group to promote them as new upcoming films like most film magazines do. Also added information on what will appear inside the magazine.
|
Dafont.com
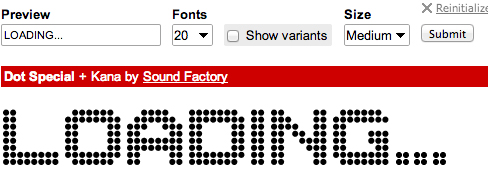
We used Dafont.com to install a lot of our fonts used in our magazine, poster and even teaser trailer. We typed in the words in the preview box on dafont.com and then searched through the fonts seeing which style of writing looked best for our work. We decided for our title 'Loading' we would use LCD style font. As it looks more digital and loading is usually connected with electronic equipment. We tried to find a metallic looking font to match the metal looking film strip.
|
We typed in 'LOADING' into the preview bar and searched through LCD fonts until we found a font that we liked. We then installed it, and it was instantly added in photoshop for us to use.

|
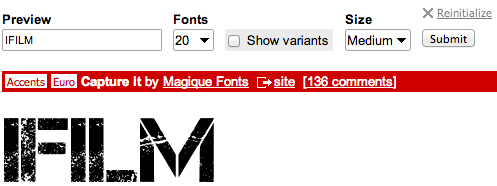
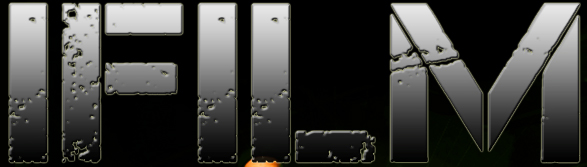
We typed in 'IFILM' into the preview bar and searched till we found a distorted kind of font. We then added effects on photoshop, changing the colour to silver and adding a glow to give the font a metallic look.
|
Prezi

Prezi is a presentation software and storytelling tool for presenting ideas on a virtual canvas. We used this in our evaluation to help answer one of the questions. It is extremely easy to use and is more effective than powerpoint. It's more user-friendly and interactive than just flicking through each slide of a powerpoint. Whereas using Prezi allows you to click on the presented information and has many themes and transitions between each bit of information.
By Angus Biggar
